

Next: 16.2.3 2D Texture Volume
Up: 16.2 Volume Visualization with
Previous: 16.2.1 Overview of the
Contents
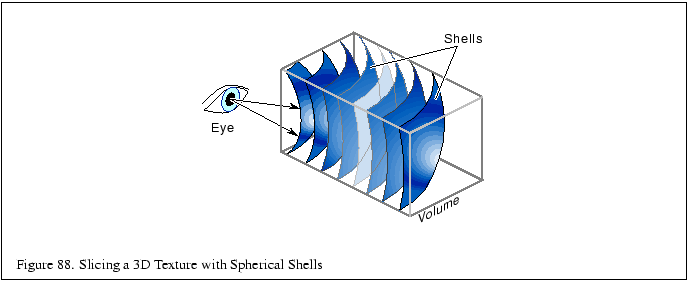
Using 3D textures for volume rendering is the most desirable method. The slices
can be oriented perpendicular to the viewer's line of sight, and creating
spherical slices for close-up views doesn't lead to sampling errors.
Here are the steps for rendering a volume using 3D textures:
- Load the volume data into a 3D texture. This is done once for a particular
data volume.
- Choose the number of slices, based on the criteria in
Section 16.2.5. Usually this matches the texel
dimensions of the volume data cube.
- Find the desired viewpoint and view direction.
- Compute a series of polygons that cut through the data perpendicular
to the direction of view. Use texture coordinate generation to texture the
slice properly with respect to the 3D texture data.
- Use the texture transform matrix to set the desired orientation of
the textured images on the slices.
- Render each slice as a textured polygon, from back to front. A blend
operation is performed at each slice; the type of blend depends on the
desired effect. See the blend equation descriptions in
Section 16.2.4 for details.
- As the viewpoint and direction of view changes, recompute the data slice
positions and update the texture transformation matrix as necessary.


Next: 16.2.3 2D Texture Volume
Up: 16.2 Volume Visualization with
Previous: 16.2.1 Overview of the
Contents
2001-01-10

